
Internet connection problems are frustrating. One of the quickest and most effective fixes many IT professionals use is releasing and renewing your IP address. Whether you’re dealing with slow internet, “No Internet Access” errors, or connectivity drops, this simple process often resolves the issue in seconds.
In this comprehensive 2026 guide, I’ll explain everything you need to know about IP address release and renewal on Windows. From basic concepts to advanced troubleshooting, you’ll learn when to use this method, how to do it safely, and how to avoid common mistakes. As someone who has troubleshot thousands of network issues, I’ll also share my personal experiences and practical suggestions to help you maintain a stable connection.
IP Address
An IP (Stand for Internet Protocol) address is a unique numerical label assigned to every device connected to a network. It works like a postal address, allowing data to be sent and received correctly between your device and the internet.
There are two main types:
- IPv4 (e.g., 192.168..4.65) still the most common.
- IPv6 (longer format) increasingly used for future-proofing.
Your device usually receives a dynamic IP from your router or ISP via DHCP (Dynamic Host Configuration Protocol). Sometimes this assignment fails or conflicts, causing connectivity problems.
My Experience: In my observation, most home and small office issues stem from DHCP lease problems rather than hardware failure. Understanding this helps you fix issues faster without unnecessary restarts or router resets.
When Should You Release and Renew Your IP Address
Releasing and renewing your IP address forces your device to request a fresh IP from the DHCP server. Do this when you experience:
- “No Internet Access” or limited connectivity
- Slow or unstable connection
- IP conflict errors
- After changing router settings or moving devices
- DNS-related problems that persist after flushing DNS
- After VPN disconnection issues
My Suggestion: This is often the first troubleshooting step I recommend before power cycling your router. It’s quick, safe, and non-disruptive. In 2026, with more devices on home networks (smart TVs, IoT gadgets, multiple laptops), IP conflicts have become more common.
Release and Renew IP Address Using Command Prompt
Method 1: Using Command Prompt (Recommended)
Go to the Start menu, search for “CMD”, and open Command Prompt. I have also shared a shortcut method below.
- Press Windows key + S, type cmd, right-click Command Prompt, and select Run as administrator.
- Type the following command and press Enter: ipconfig /release
- Wait for the process to complete.
- Type this command and press Enter: ipconfig /renew
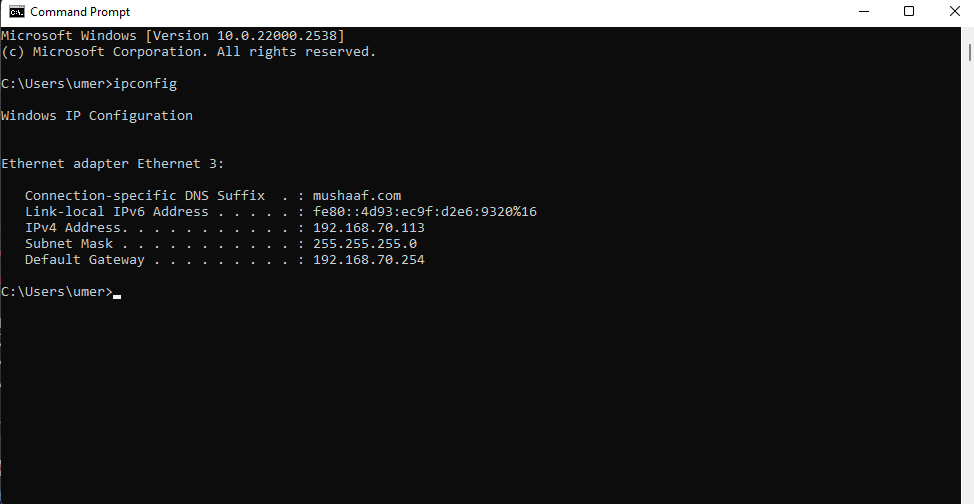
- Verify with: ipconfig /all
You should see a new IP address assigned.
Method 2: Using Network Settings (GUI)
- Go to Settings > Network & Internet > Ethernet/Wi-Fi → Click your connection → Properties → IP settings → Edit → Switch to Automatic (DHCP).
My Experience: I always prefer Command Prompt because it’s faster and gives clear feedback. Over the years, I’ve fixed countless “limited connectivity” issues for users simply by running these two commands.
Advanced Commands You Should Know
- ipconfig /flushdns — Clears DNS cache
- ipconfig /registerdns — Re-registers with DNS server
- netsh int ip reset — Resets TCP/IP stack (use carefully)
- netsh winsock reset — Resets Winsock catalog
My Insight: Create a simple batch file with these commands for quick troubleshooting. Save it as network_reset.bat and run as administrator when needed.
1. Full Network Reset (Most Powerful)
netsh winsock reset
netsh int ip reset
ipconfig /flushdns
ipconfig /release
ipconfig /renew
When to use: When basic release/renew doesn’t work or after malware removal.
My Experience: This combination has fixed stubborn connectivity issues for me more times than I can count. It resets the TCP/IP stack and Winsock catalog without reinstalling Windows.
Release & Renew Specific Adapter
cmd
ipconfig /release "Wi-Fi"
ipconfig /renew "Ethernet"
Replace with your adapter name (check via ipconfig /all).
PowerShell Alternatives (Modern Way)
Restart-NetAdapter -Name "Wi-Fi"
ipconfig /release
ipconfig /renew
Get Detailed Network Diagnostics
netsh wlan show interfaces
netsh wlan show drivers
These helps indentify wifi adopter
My Suggestion: Create a one-click batch file for quick fixes. Copy the commands into Notepad and save as FixNetwork.bat. Right-click and “Run as administrator” whenever needed.
Common Errors and How to Fix Them
Error: “Unable to contact your DHCP server” Solution: Restart your router/modem, check cables, or run ipconfig /release followed by ipconfig /renew after a 30-second wait.
“The operation failed as no adapter is in the state permissible for this operation” Solution: Disable and re-enable your network adapter in Device Manager.
IP Address Doesn’t Change Solution: Restart your PC or router. In rare cases, release/renew on the router side.
My Experience: The most common root cause I’ve seen is overloaded routers or outdated firmware. Updating your router’s firmware often prevents recurring IP issues.
Advanced Troubleshooting Tips
- Check Router Logs — Access your router (usually 192.168.1.1) and look for DHCP errors.
- Switch to Static IP Temporarily — Useful for testing but not recommended long-term.
- Use PowerShell — For advanced users: Restart-NetAdapter -Name “Ethernet”
- Monitor with Tools — Wireshark or Microsoft Network Monitor for deeper analysis.
- IPv6 Considerations — In 2026, many ISPs use dual-stack. Try disabling IPv6 temporarily to test.
My Personal Recommendation: For home users, stick to basic commands. For power users or IT professionals, combine IP renewal with DNS flushing and adapter reset for best results.
When to Go Beyond Release/Renew
If the problem persists:
- Update network drivers
- Check for malware
- Contact your ISP
- Consider upgrading your router (Wi-Fi 6E or 7 recommended in 2026)
Best Practices for Stable Network Connection
- Restart devices weekly
- Use wired connections for critical work
- Keep router firmware updated
- Limit excessive devices on one network
- Use mesh systems for larger homes
My Final Suggestion: Treat your home network like a small business setup. Proper configuration and regular maintenance prevent 80% of connectivity issues I’ve encountered.
Bonus Troubleshooting Commands
- ping 8.8.8.8 — Tests connectivity to Google DNS
- ping google.com — Tests DNS resolution
- tracert google.com — Shows where connection drops
- nslookup google.com — Checks DNS server response
My Experience: Always test with ping 8.8.8.8 first. If it works but ping google.com fails, the problem is DNS-related (flush DNS + renew IP usually fixes it).
Conclusion
Releasing and renewing your IP address is a simple yet powerful troubleshooting technique every Windows user should know. It resolves a wide range of network problems quickly and safely. By understanding the process and following the steps in this guide, you can save time and avoid unnecessary frustration.
For more please click on the below link
One thought on “How to Release and Renew an IP Address on Windows”