Introduction
WatchGuard Firebox is a powerful and popular next-generation firewall (NGFW) designed to protect small and medium-sized businesses from cyber threats. It provides advanced security features such as firewall protection, VPN support, intrusion prevention, web filtering, and application control.
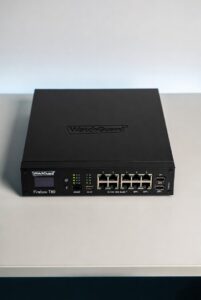
The WatchGuard Firebox T80 is one of the most widely used models in the T Series. It is perfect for small offices, branch locations, or retail environments that need reliable security and high performance with simple management.
In this beginner-friendly WatchGuard Firebox basic configuration guide, I will walk you through the initial setup, network configuration, security policies, and essential settings after unboxing your Firebox T80.
Prerequisites
Before starting the basic configuration:
- WatchGuard Firebox T80 device
- Power adapter and Ethernet cables
- A computer with an Ethernet port
- Access to the internet (for licensing and updates)
- Latest Fireware OS (recommended v12.10 or higher)
Physical Connection and Initial Access
- Connect the power cable to the Firebox T80 and turn it on.
- Connect your computer to any free Ethernet port on the Firebox (recommended: Port 1 or Port 2).
- The default IP address of the Firebox is 192.168.111.1
- Configure your computer’s IP address manually:
- IP Address: 192.168.111.2
- Subnet Mask: 255.255.255.0
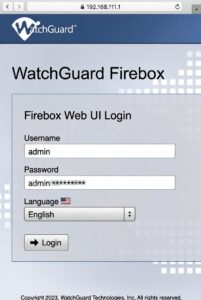
- Open a web browser and go to: https://192.168.111.1
You will see the WatchGuard Firebox login page.
Default Login Credentials:
- Username: admin
- Password: readwrite
Security Tip: Change the default password immediately after first login.
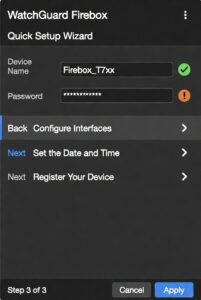
Run the Quick Setup Wizard
After logging in, the Quick Setup Wizard will launch automatically.
Follow these steps:
- Device Name: Give your Firebox a meaningful name (e.g., WG-Firebox-T80-Office)
- Administrator Password: Set a strong new password
- Time Zone: Select your correct time zone (Asia/Karachi for Pakistan)
- External (WAN) Interface:
- Choose the port connected to your ISP (usually Port 0 or External)
- Select Static IP or DHCP depending on your internet connection
- Enter your public IP, gateway, and DNS if using Static IP
- Trusted (LAN) Interface:
- Usually Port 1 or Internal
- Set your internal network (example: 192.168.10.1/24)
- Complete the wizard and click Finish.
Configure Basic Network Interfaces
After the wizard:
- Go to Network → Interfaces
- Configure each port as needed:
- External: WAN / Internet connection
- Trusted: Internal LAN users
- Optional: Guest WiFi, Servers, or DMZ
- Set proper IP addresses and enable DHCP Server on the Trusted interface for automatic IP assignment to computers.
Recommended Basic Setup:
- External (WAN): Get IP from ISP (DHCP or Static)
- Trusted (LAN): 192.168.10.1/24 with DHCP enabled (range 192.168.10.100 – 192.168.10.200)
Create Basic Firewall Policies
Firewall policies control what traffic is allowed.
-
Go to Firewall → Firewall Policies
-
Create these essential policies:
- Outbound Policy: Allow all traffic from Trusted (LAN) to External (WAN)
- Ping & DNS: Allow ping and DNS from LAN to WAN
- Inbound Policy (if needed): Allow specific services from internet to your servers
Pro Tip: Always keep the default “Any-External” policy disabled or restricted for security.

License Activation and Security Services
- Go to System → Licensing
- Enter your WatchGuard Account credentials to activate the device.
- Enable important security services:
- Intrusion Prevention Service (IPS)
- WebBlocker
- Gateway Antivirus
- Application Control
These services turn your Firebox into a true Next-Generation Firewall.
Update Fireware OS and Signatures
- Go to System → Upgrade
- Check for the latest Fireware version and install it.
- Update all security signatures (IPS, Antivirus, WebBlocker).
Keeping your Firebox updated is critical for protection against new threats.
Basic Configuration Checklist
- Change default admin password
- Configure WAN and LAN interfaces correctly
- Set up DHCP server on LAN
- Create outbound firewall policy
- Activate licenses and security subscriptions
- Update Fireware OS and signatures
- Enable logging for troubleshooting
Common Issues and Quick Fixes
- Cannot access Web UI: Check cable, IP address (192.168.111.2), and HTTPS
- No internet after setup: Verify WAN interface settings and outbound policy
- DHCP not working: Check Trusted interface configuration